


Improve diabetes management and help reduce your risk of complications with these expert-backed exercises for fighting visceral fat.

Insulin resistance, a characteristic of type 2 diabetes, is exacerbated by excess weight around the belly.
Everyone appears to desire a lower waistline and a smaller trouser size – you know how it goes. But losing weight is about more than how you appear in the mirror; it’s also about improving your insulin sensitivity, glucose levels, and risk of diabetic consequences including heart attacks, strokes, and some forms of cancer.
Regular exercise is a crucial aspect of successfully treating diabetes, and it may also help you minimise your risk of COVID-19-related problems if you become infected with the new coronavirus. People with diabetes are at an increased risk of problems, according to the Centers for Disease Control and Prevention (CDC), especially if their blood sugar is not effectively managed.
“Current research shows that abdominal fat is a driving factor behind the development of insulin resistance and type 2 diabetes, as well as [a factor that affects] how people manage the condition,” explains Margaret Eckert-Norton, PhD, RN, a certified diabetes educator and nurse practitioner with the diabetic treatment center at SUNY Downstate Medical Center in Brooklyn, New York.
Belly fat (also called abdominal, visceral, or central fat) also thwarts your body’s immunity. A study published in January 2016 in Advances in Nutrition linked central obesity to reduced immune function. And your insulin health does impact your immunity and susceptibility to viral infections, according to a study published online in March 2020 in Diabetes & Metabolic Syndrome Clinical Research & Reviews. The authors emphasize that while COVID-19 cases may be more severe in people with diabetes, improved glycemic control can reduce the likelihood and severity of coronavirus infection.
The Difference Between Visceral Fat and Subcutaneous Fat
Visceral fat hangs out in and around your internal organs. It’s known to secrete a variety of proteins that trigger inflammation and affect your body’s hormone levels, and it can increase your risk for a variety of conditions (but more on this later). For this reason, some experts actually call it “active fat.” That’s in contrast to subcutaneous fat, which sits directly underneath your skin and mostly acts as an energy reserve without strongly influencing health, Dr. Eckert-Norton says.
How Excess Belly Fat Can Increase the Risk of Diabetes Complications
So what are those conditions that belly fat influences? The first and most notable one for anyone with diabetes is insulin resistance, she says. One of the many factors at play is retinol-binding protein 4 (RBP4), a compound that visceral fat cells secrete that dulls the body’s sensitivity to the hormone insulin and encourages the development and progression of type 2 diabetes and its complications, according to past research.
Meanwhile, recent research shows that excess belly fat can significantly increase the risk of cancer all on its own. For instance, in a study published in August 2017 in the journal Oncogene, visceral fat cells were found to produce high levels of a protein called fibroblast growth factor 2, or FGF2, which can trigger cancer formation. What’s more, it’s important to remember that visceral fat sits right next to (and even inside of) your organs, meaning that it can directly affect the health and function of your liver, heart, and lungs.
While diabetes in and of itself is associated with poor COVID-19 health outcomes, heart disease is another important risk factor in coronavirus mortality, according to a study published in the Lancet in March 2020.
Do You Have Too Much Belly Fat? A Simple Way to Find Out
Measuring the diameter of your waist at the top of your hipbones is the simplest approach to determine your belly fat levels and risk of abdominal-obesity-related diseases. According to an American Heart Association and National Heart, Lung, and Blood Institute statement published in the journal Circulation, abdominal measures larger than 35 inches in women and 40 inches in men indicate abdominal obesity and chronic health risk.
Why Exercise Might Be More Important Than Cutting Calories for Losing Belly Fat
While everything from slashing stress to eating fewer processed foods has been shown to help combat belly fat, exercise is one of the best things you can do to reduce weight in this area and live healthier with diabetes, says Pat Salber, MD, an internist and the founder of The Doctor Weighs In, who’s based in Larkspur, California.
She notes that in a meta-analysis published in the journal PLoS One, exercise was found to significantly lower people’s visceral fat levels, even if they didn’t cut calories. What’s more, when it comes to the best forms of exercise for improving insulin sensitivity, immunity, and overall health, research suggests that high-intensity strength training is where it’s at.
What Research Says About the Benefits of High-Intensity Strength Training
For instance, according to a study published in February 2015 in the journal Obesity, when researchers at the Harvard School of Public Health followed 10,500 men for 12 years, they found that, minute per minute, strength training targeted belly fat better than cardio did. And in a study in the Internal Journal of Cardiology, high-intensity resistance training was found to be significantly better at reducing visceral fat levels and preventing symptoms in people with metabolic syndrome compared with more endurance-based workouts. Metabolic syndrome is a cluster of conditions, including hypertension, hyperglycemia, excess belly fat, and abnormal cholesterol or triglyceride levels.
Think you don’t have time to reap the potential benefits of exercise? Not true. “The beauty of high-intensity workouts is that the total amount of time to achieve fitness benefits is shorter than working out at lower intensities,” Dr. Salber says.
What People With Diabetes Should Know Before Giving It a Try
Don’t worry: High-intensity resistance exercise is all about moving your body in a way that feels challenging to you, and it doesn’t have to be high-impact. Remember, it’s important to keep your feet safe, and pounding the pavement or gym floor with high-impact exercise can increase your risk of cuts, blisters, and infection. No one wants that.
The best way to structure high-intensity resistance exercise depends on your current fitness level. After all, the fitter you are, the more weight you can move with each rep and the less you need to rest between sets. But as a general rule of thumb, you should be able to perform 15 to 20 reps per set with proper form, according to an article published in the ACSM’s Health & Fitness Journal. Rest for 30 seconds or less between sets.
And, as with any type of exercise, it’s important to warm up before and cool down after your high-intensity resistance training. Spend 5 to 10 minutes walking, jogging, or performing gentle bodyweight exercises. Save any stretching for after your training session.
Ideally, you’d strength train at least three times per week, on nonconsecutive days. That will give your body the rest time it needs to spring back from each workout stronger and healthier than before.
The Best Diabetes-Friendly Exercises to Help You Lose Belly Fat Fast
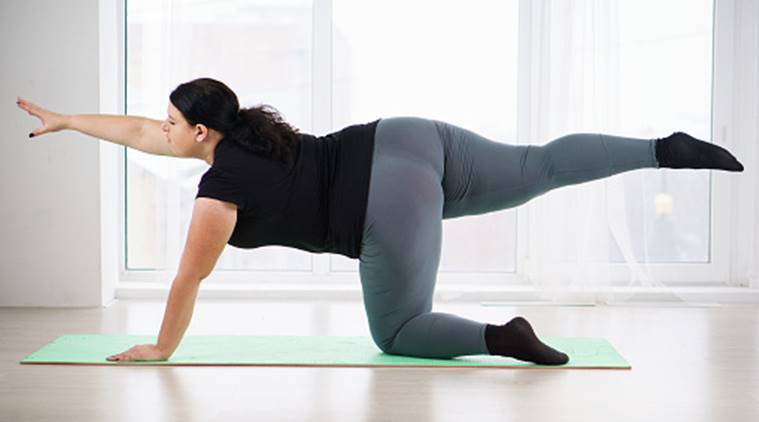
Here are five high-intensity (but low-impact) resistance workouts to help you lose belly fat and improve your diabetes control and overall health. Check your blood sugar levels before, during, and after your workouts, as usual. For a genuine challenge, mix these exercises in with your normal routines or do them all at once. Make sure you relax for two to three minutes between each activity.
1. Dumbbell Squat to Overhead Press

What you’ll need: a pair of dumbbells at a weight of your choice
Stand tall with your feet shoulder-width apart and hold a pair of dumbbells in front of and against your shoulders, palms facing each other and your elbows pointed down toward the floor. Pull your shoulders back and brace your core. This is your starting position.
From here, push your hips back and bend your knees to lower your body as far as you comfortably can down into a squat, keeping your torso up as you do so. As soon as you hit the lowest point of your squat, immediately push through your heels to return to standing, and simultaneously press the dumbbells up overhead until your arms are straight, but with your elbows not locked. This is your starting position for the rest of your reps.
2. Reverse Lunge to Single-Arm Cable Row

What you’ll need: a cable machine (found at most gyms) with a D-shaped handle, or a resistance band attached to a sturdy object
Attach a D-shaped handle to a cable machine at knee height. You can also use a resistance band secured to a strong object such as a pole or table leg. Stand tall facing the anchor point with your feet spread hip-width apart, and hold the handle with your right hand, your arm fully extended and palm facing in. Pull your shoulders back and brace your core. The cable or resistance band should have some tension but shouldn’t feel “heavy.” This is your starting position.
From here, take a giant step back with your right foot, then bend your knees to lower as far as you comfortably can into a lunge. Pause, then pull the handle to meet the side of your torso, keeping your elbow pointed straight back behind you as you do so. Pause, reverse the row, then press through your front foot to return to standing. That’s one rep. Perform all reps and then repeat on the opposite side.
3. Dead Lift

What you’ll need: an EZ-bar the weight of your choice (also available in most gyms), dumbbell, or kettlebell
Stand with your feet hip-width apart and hold a loaded EZ-bar (it’s a short barbell with two curves where your hands go) against your thighs, hands shoulder-width apart and palms facing your body. If you’re performing this exercise at home or don’t have access to an EZ-bar, you can hold a pair of dumbbells or kettlebells with both hands, your arms straight down in front of your thighs and your palms facing your body. This is your starting position.
From here, keeping your core tight, back flat, and shoulders pinned back, push your hips behind you and, allowing a slight bend in your knees, slide the weight down your legs until it’s just below your kneecaps or you feel a slight pull in your hamstrings. If you’re using dumbbells or kettlebells, the weight should stay close to your legs throughout the entire move. Pause, then drive through your feet and squeeze your glutes to return to a tall standing position.
4. Incline Push-up

What you’ll need: a kitchen counter, a sturdy bench, a piece of furniture, or a wall
Place your hands on your surface of choice so that they’re slightly wider than your shoulders, and step your feet back behind you. Your body should form a straight line from head to heels. Pull your shoulders back away from your ears, and brace your core. This is your starting position.
From here, bend your elbows and lower your chest between your hands until it nearly touches the bench. Allow your elbows to flare out diagonally from your torso; they should not be tucked behind you or out straight to the sides. Pause at the bottom, then push through your hands to return to start, making sure to keep your body in a straight line as you do so. That’s one rep.
5. Kettlebell Swing

What you’ll need: a kettlebell the weight of your choice (also available at most gyms)
Stand with your feet about shoulder-width apart and a kettlebell between your feet, about one foot in front of you. Keeping a flat back, push your hips back and bend your knees just slightly (keeping your shins vertical) to grip the bell with both hands, palms facing you. With the bell still on the floor, squeeze your shoulder blades down and together so that the top of the bell tilts toward you. This is your starting position.
From here, hike the bell back between your legs. As the bell begins to come back forward, explosively thrust your hips forward to return to the standing position and drive the bell straight out in front of your body at shoulder height. (Do not pull the bell with your arms.) Allow the bell to lower on its own, then, as it nears your body, push your hips back to move immediately into the next rep.